Renting a VPS takes five minutes. Making it ready to serve real traffic is the part nobody warns you about.
A fresh Ubuntu server ships with almost nothing: no web server, no PHP or Node runtime, no database, no firewall rules, no TLS. Everything between "I have an IP address" and "my app is live" is on you.
The problem
Most developers do this rarely, maybe a few times a year. That is exactly why it hurts. The steps are just infrequent enough to forget, just fiddly enough to get wrong, and the mistakes are invisible until something breaks.
Get it slightly wrong and you end up with:
- A server listening on ports you never meant to expose
- PHP installed from three different PPAs after a version mix-up
- A MySQL root account you can't remember securing
- A "snowflake" server nobody dares touch, because nobody remembers how it was built
Every server you set up by hand is set up slightly differently. Six months later, that difference is the bug.
The traditional way: an honest walkthrough
Here is roughly what a competent manual setup of a Laravel-ready Ubuntu server looks like. Not exhaustive, and that is rather the point.
# The shape of it (a sketch, not the whole recipe):
apt update && apt upgrade -y
ufw allow OpenSSH && ufw allow 80,443/tcp && ufw enable   # firewall first, before anything listens
apt install -y nginx
add-apt-repository ppa:ondrej/php -y && apt install -y php8.5-fpm php8.5-...   # + the ~10 right extensions
apt install -y mysql-server && mysql_secure_installation  # then a database, a user, grants
# ...then Redis, Supervisor, Certbot and Node (via nvm),
# ...then Nginx server blocks, PHP-FPM pools, a deploy user, SSH hardening,
#    queue workers and TLS. Each step is order-sensitive; miss one and it bites later.
That is a sketch, not a script. The real thing is a dozen-plus steps in the right order, each with flags and config that must be exactly right. Budget an afternoon if you know it well. Budget an evening, and a long search history, if you do not.
There is real value in understanding these steps. There is very little value in typing them by hand, from memory, on every new server.
The StackPilot App workflow
StackPilot App is a local-first VPS Operations Platform. It runs on your machine, connects to your server over SSH, and performs that entire checklist for you. Your credentials never leave your computer; there is no cloud control plane sitting between you and your server.
Connecting a server takes one form and one provisioning run. Here is the whole flow end to end before we break it down step by step:
Step 1: Connect your server
Open StackPilot App and choose Connect New Server.
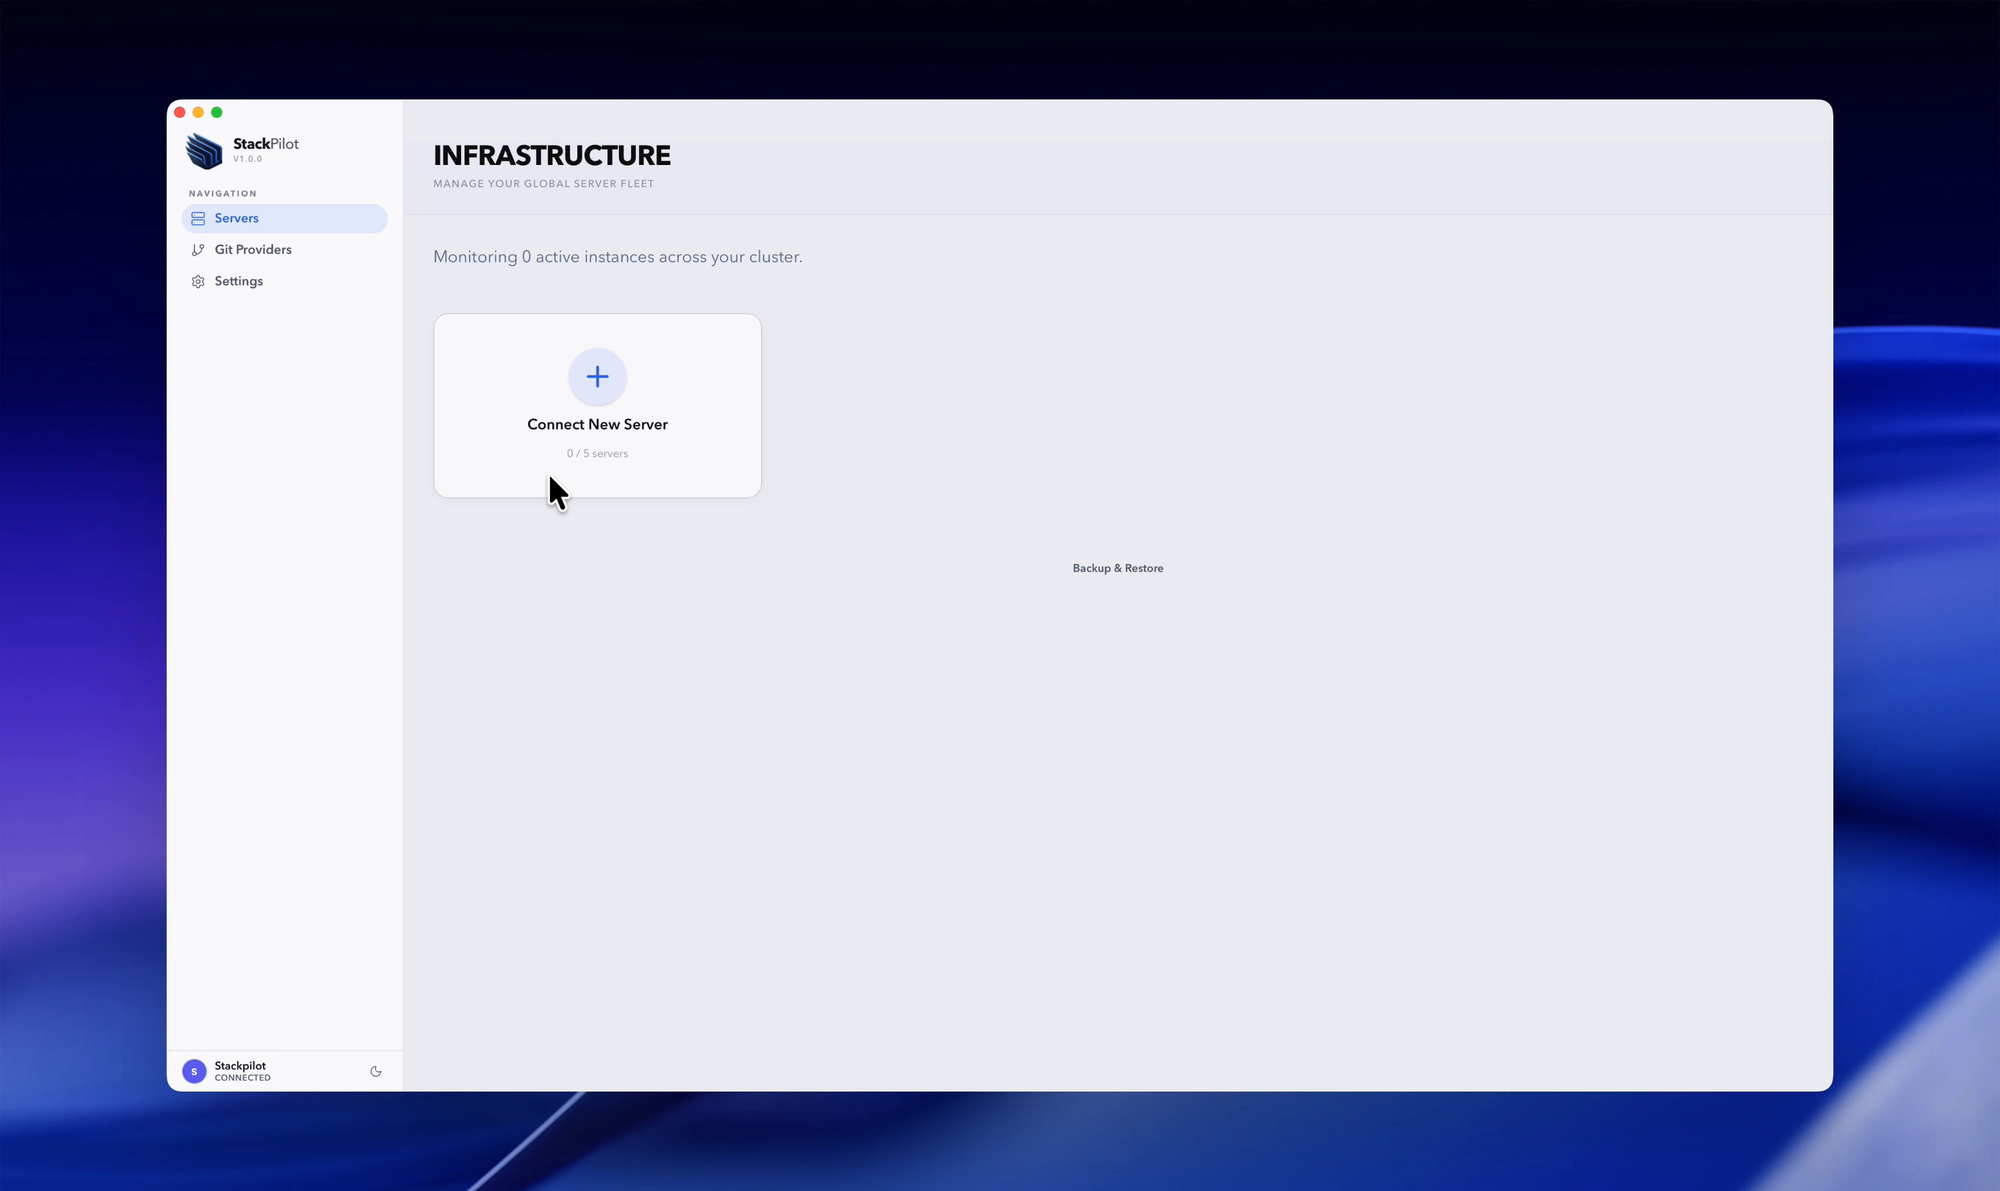
You need four things: a label, the IP address, the SSH port and a user. Any SSH-reachable Ubuntu or Debian VPS works, from any provider.
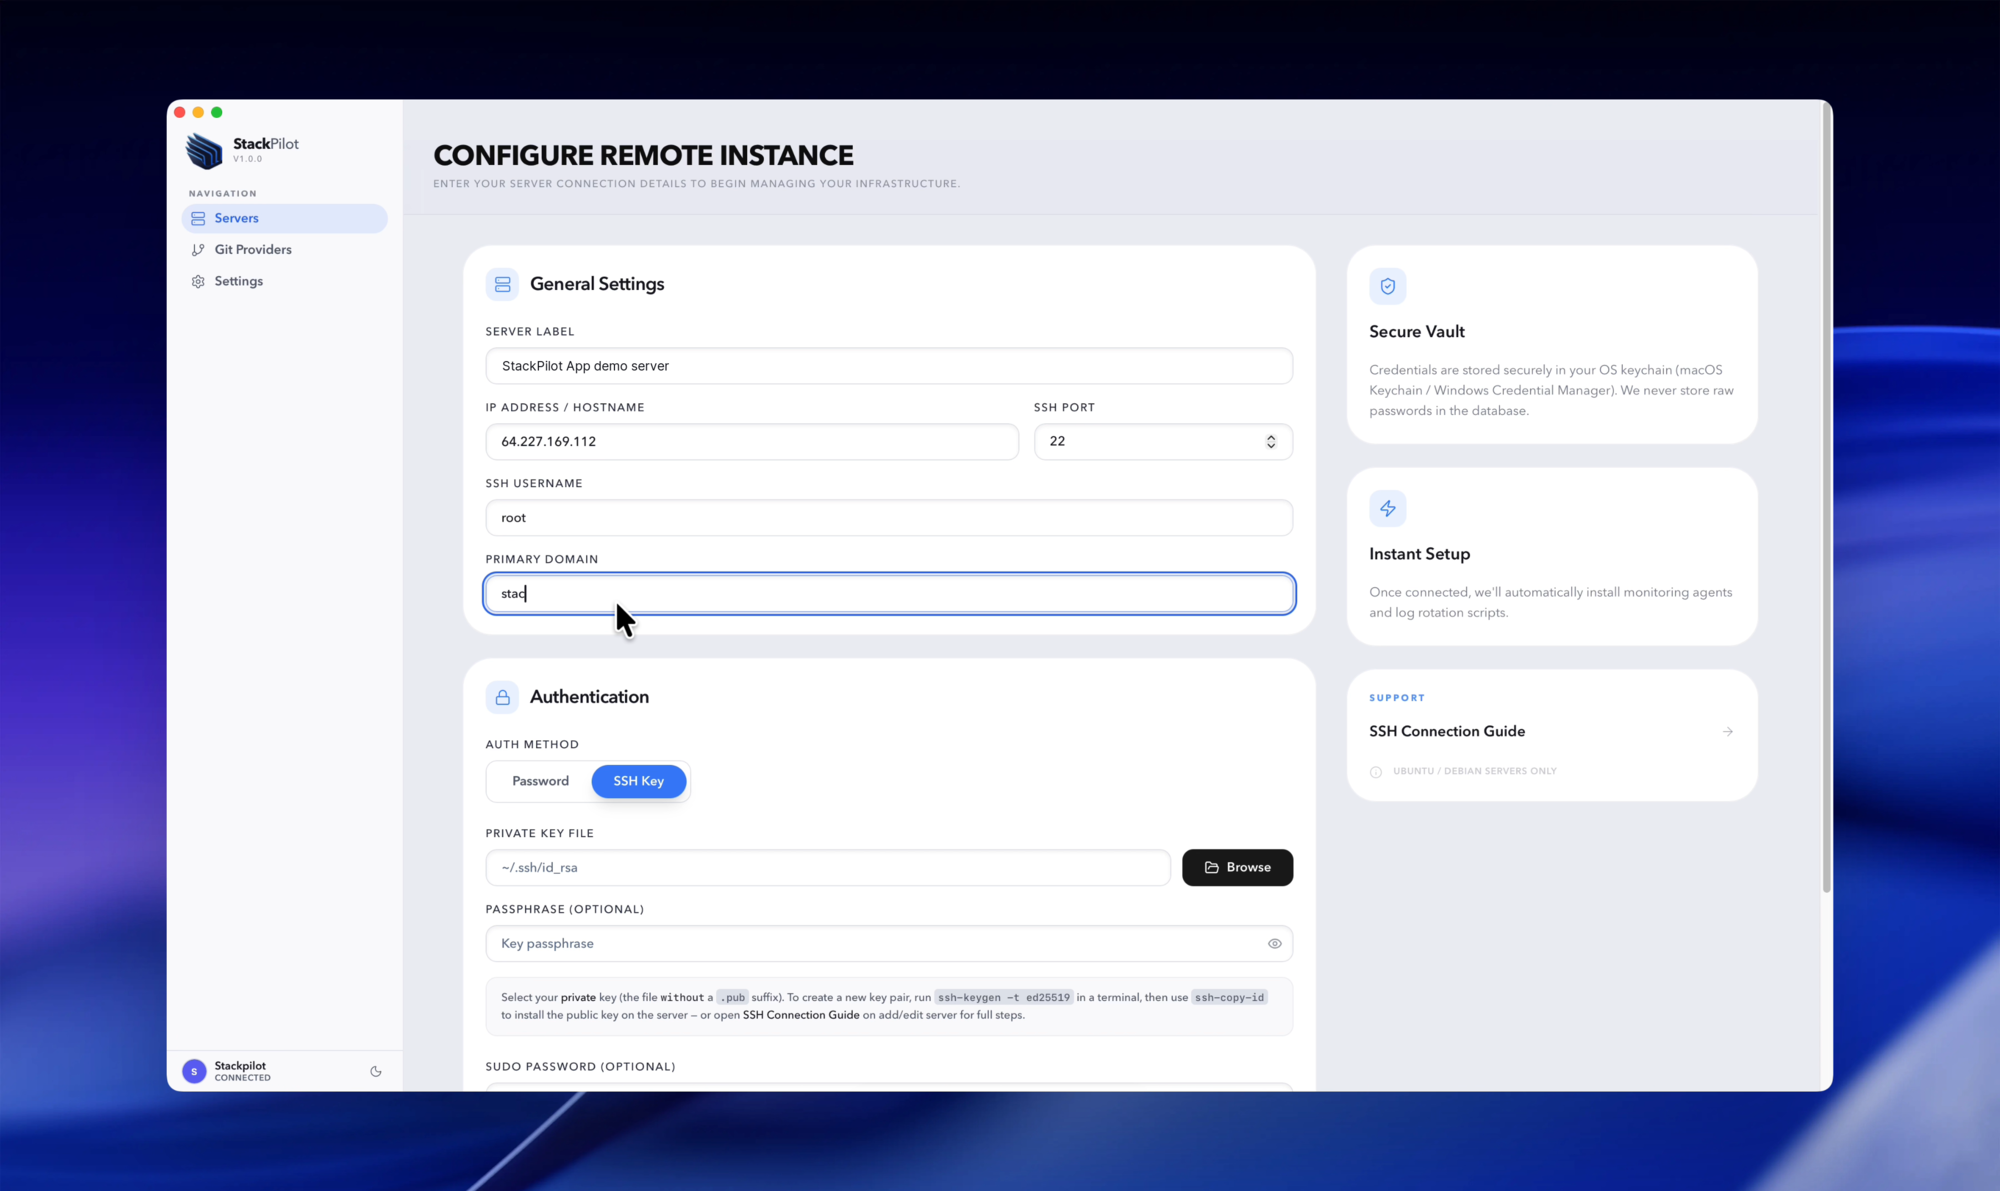
Step 2: Authenticate with SSH
Pick key-based authentication and point StackPilot App at your private key file (a root password works too, though keys are the better habit). The key is read from your machine and used for a direct SSH connection.
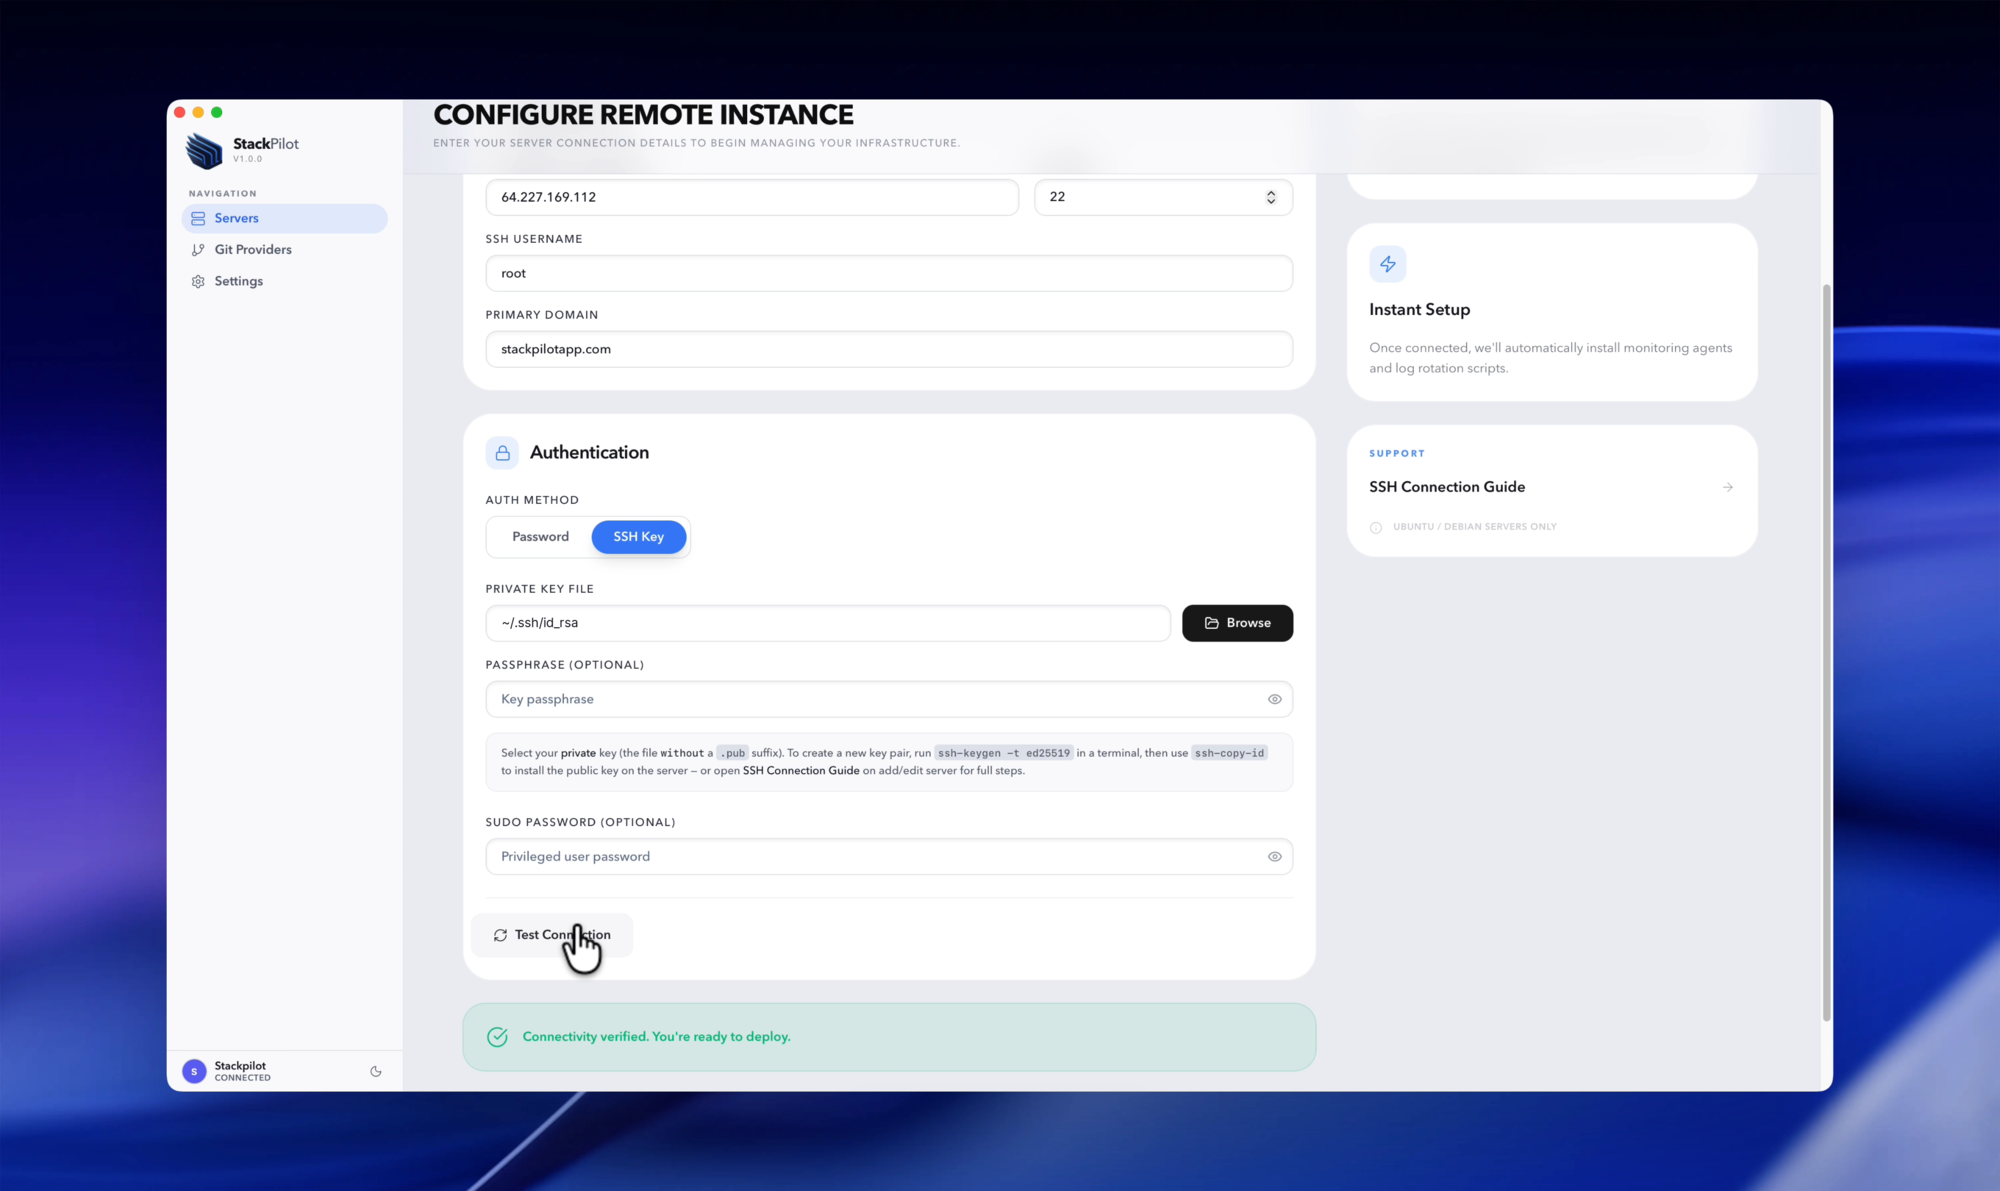
Tip: StackPilot App stores secrets like passphrases in your operating system's keychain, not in a remote database. That is the local-first part doing its job.
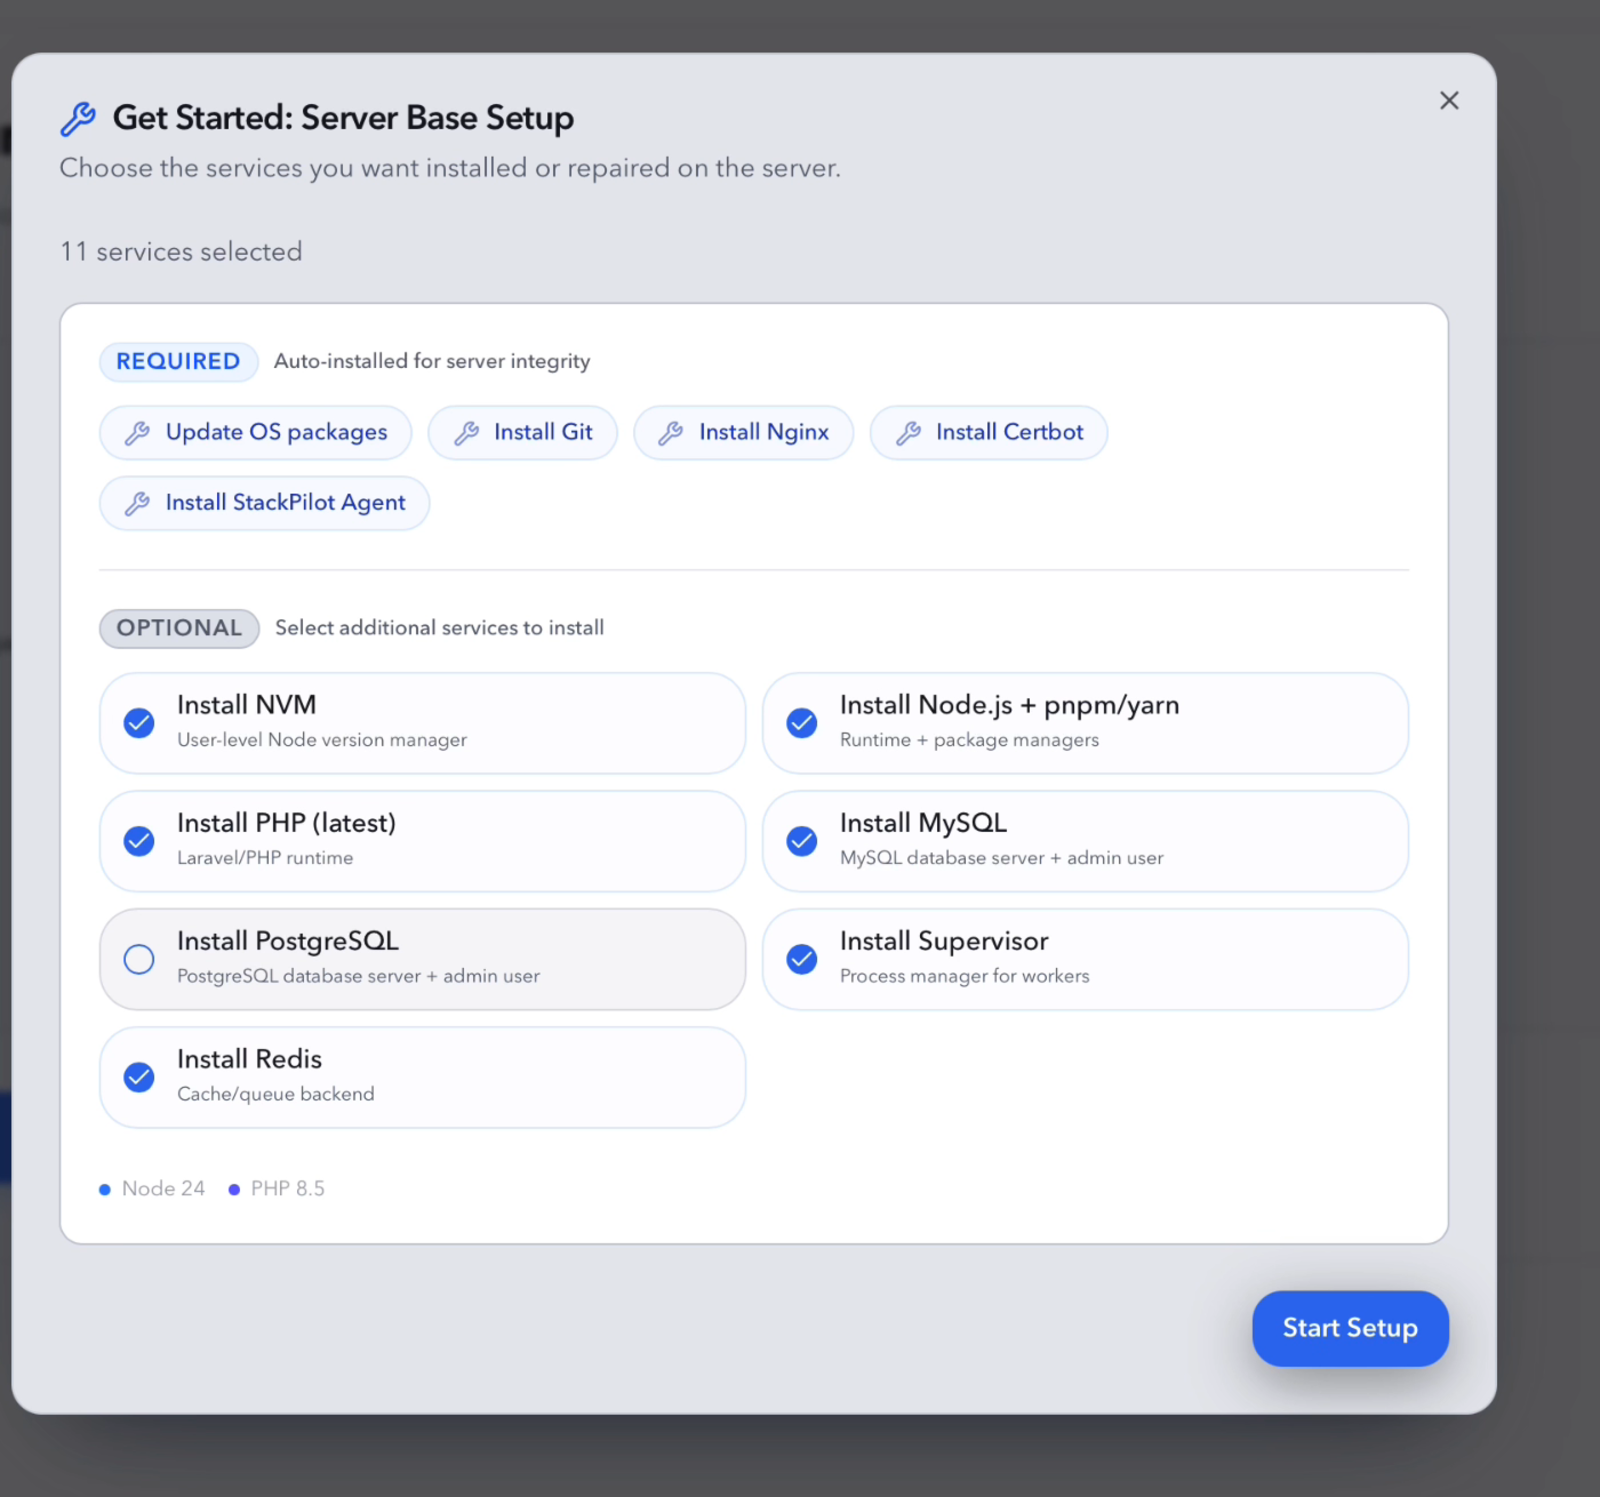
Step 3: Choose your stack
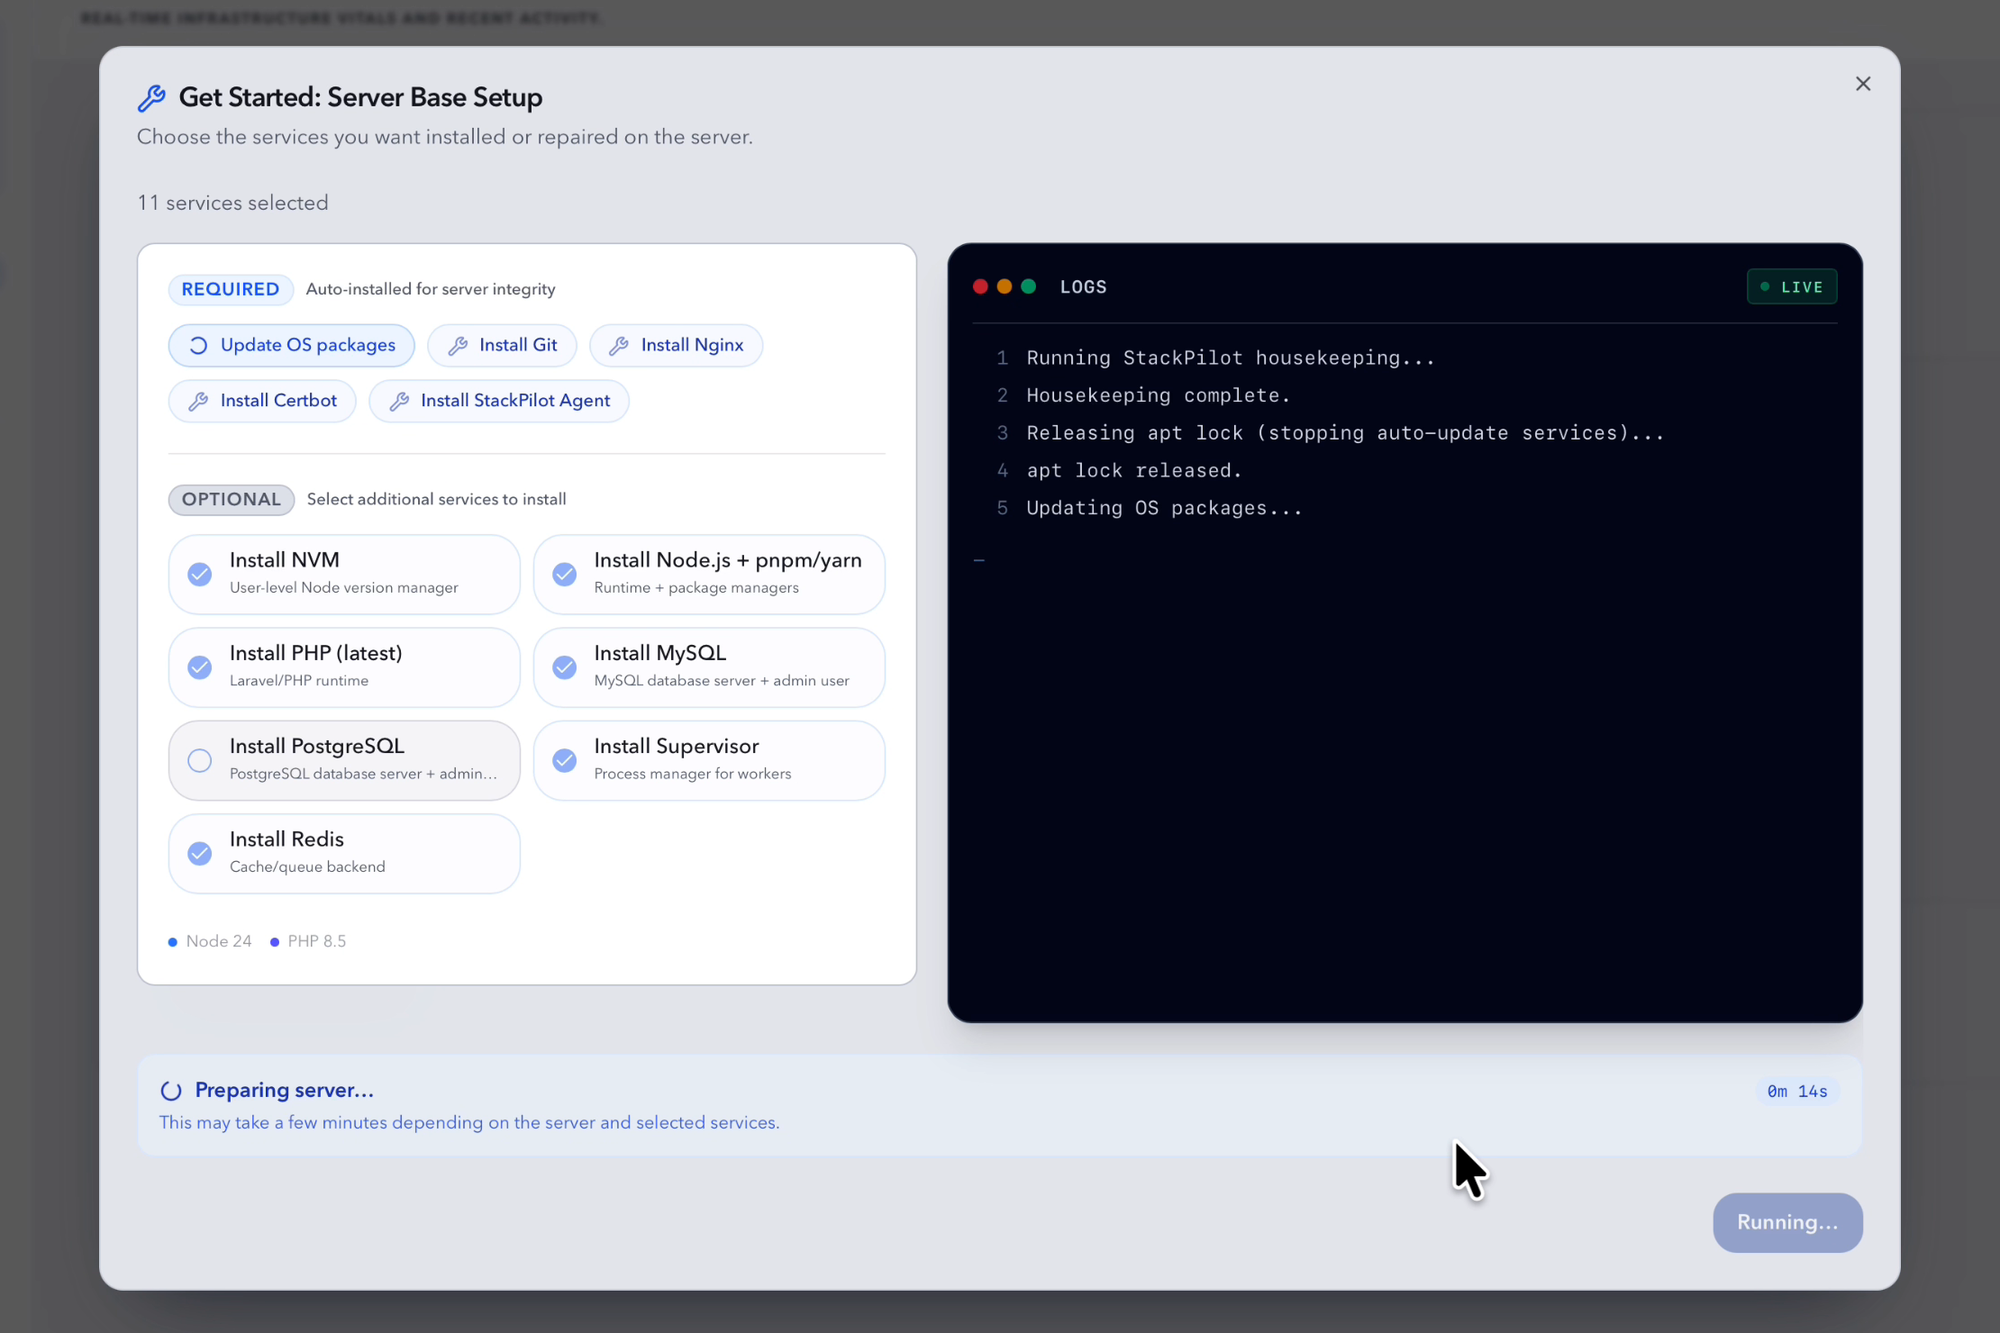
Instead of a command checklist, you get a checklist of choices: Nginx, your PHP version, MySQL or PostgreSQL, Node, Redis, Supervisor and Certbot for TLS.
Step 4: Watch it provision
StackPilot App runs the full setup over SSH and streams every step live, so you can see exactly what is happening on your server. No black box.
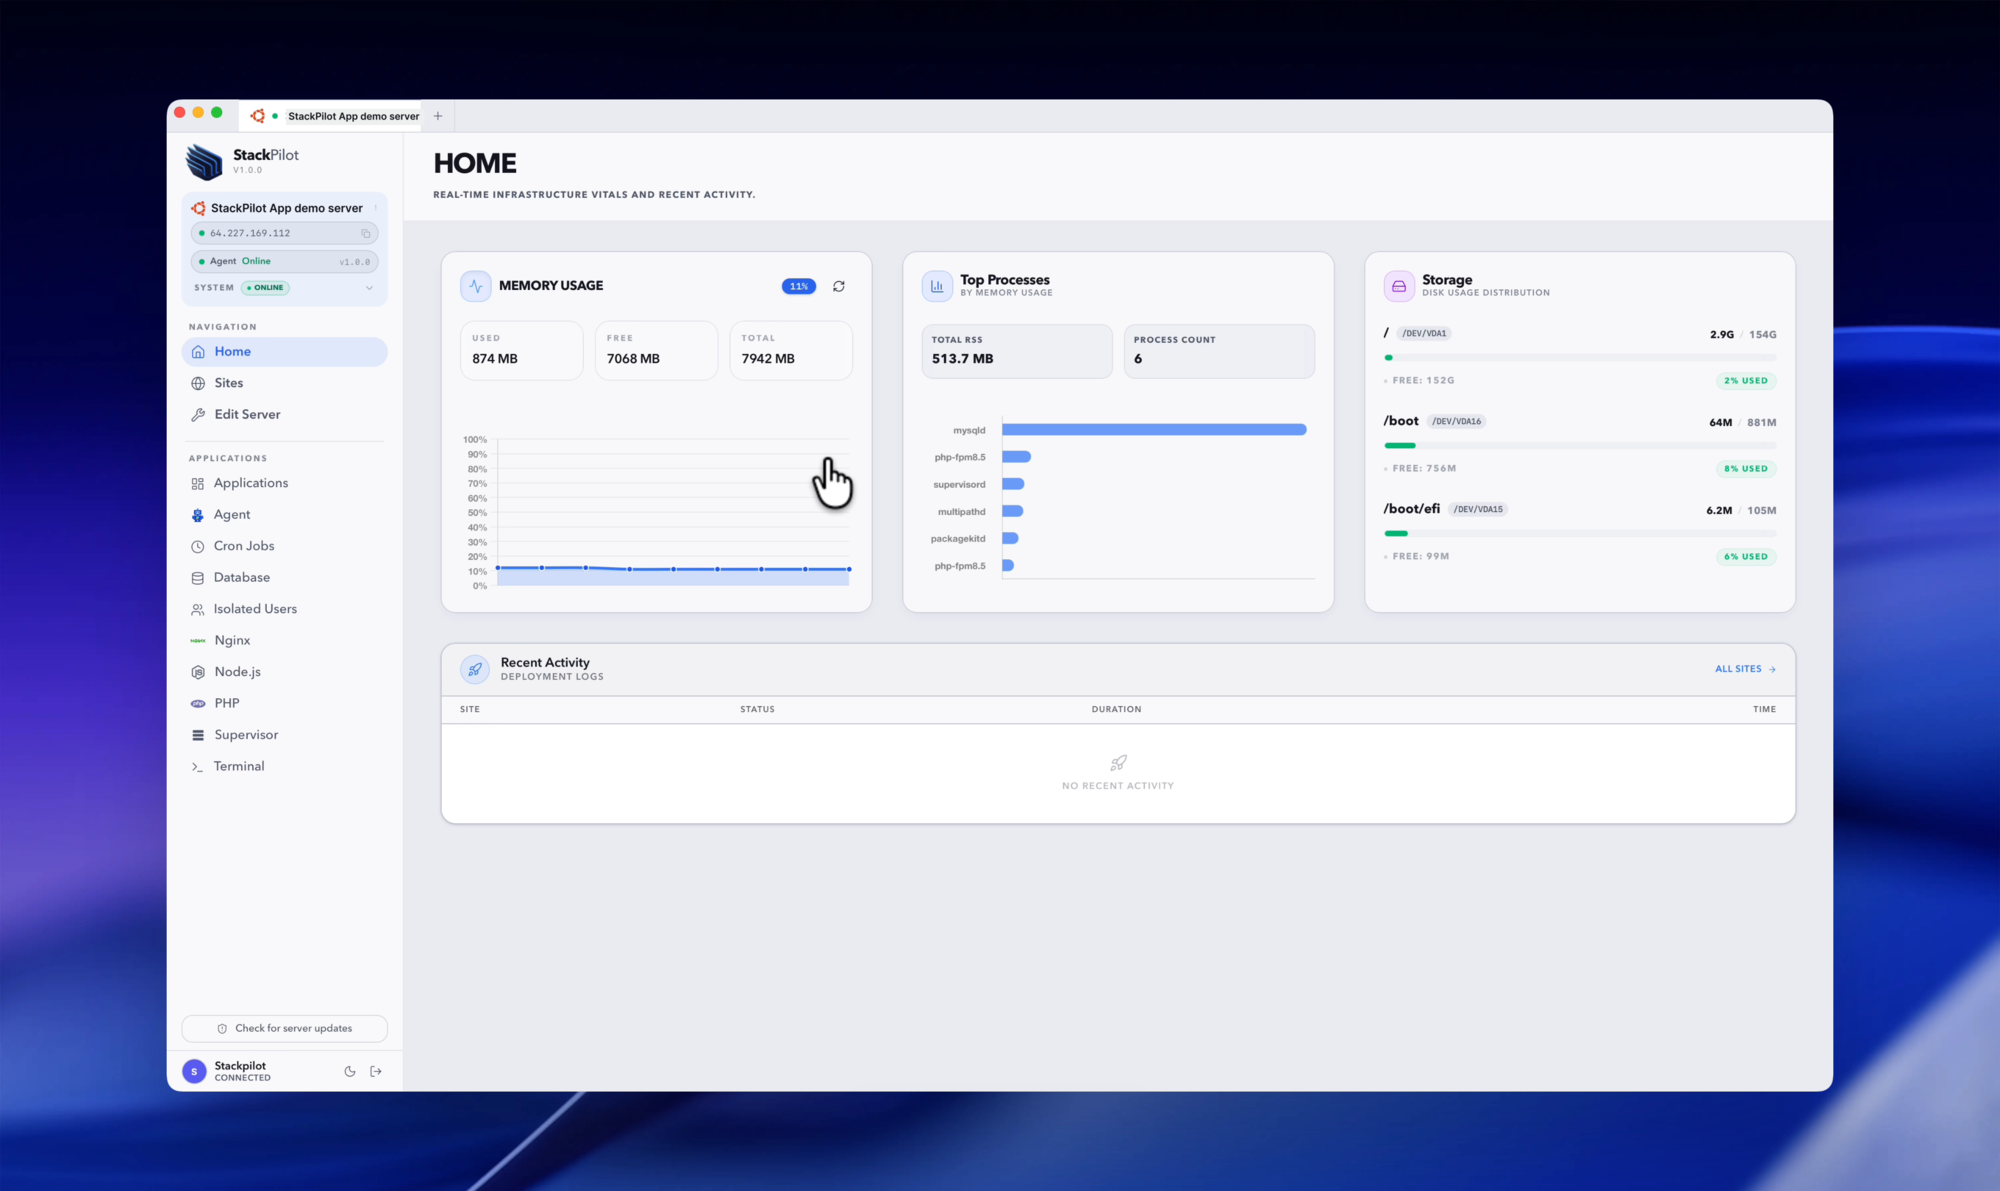
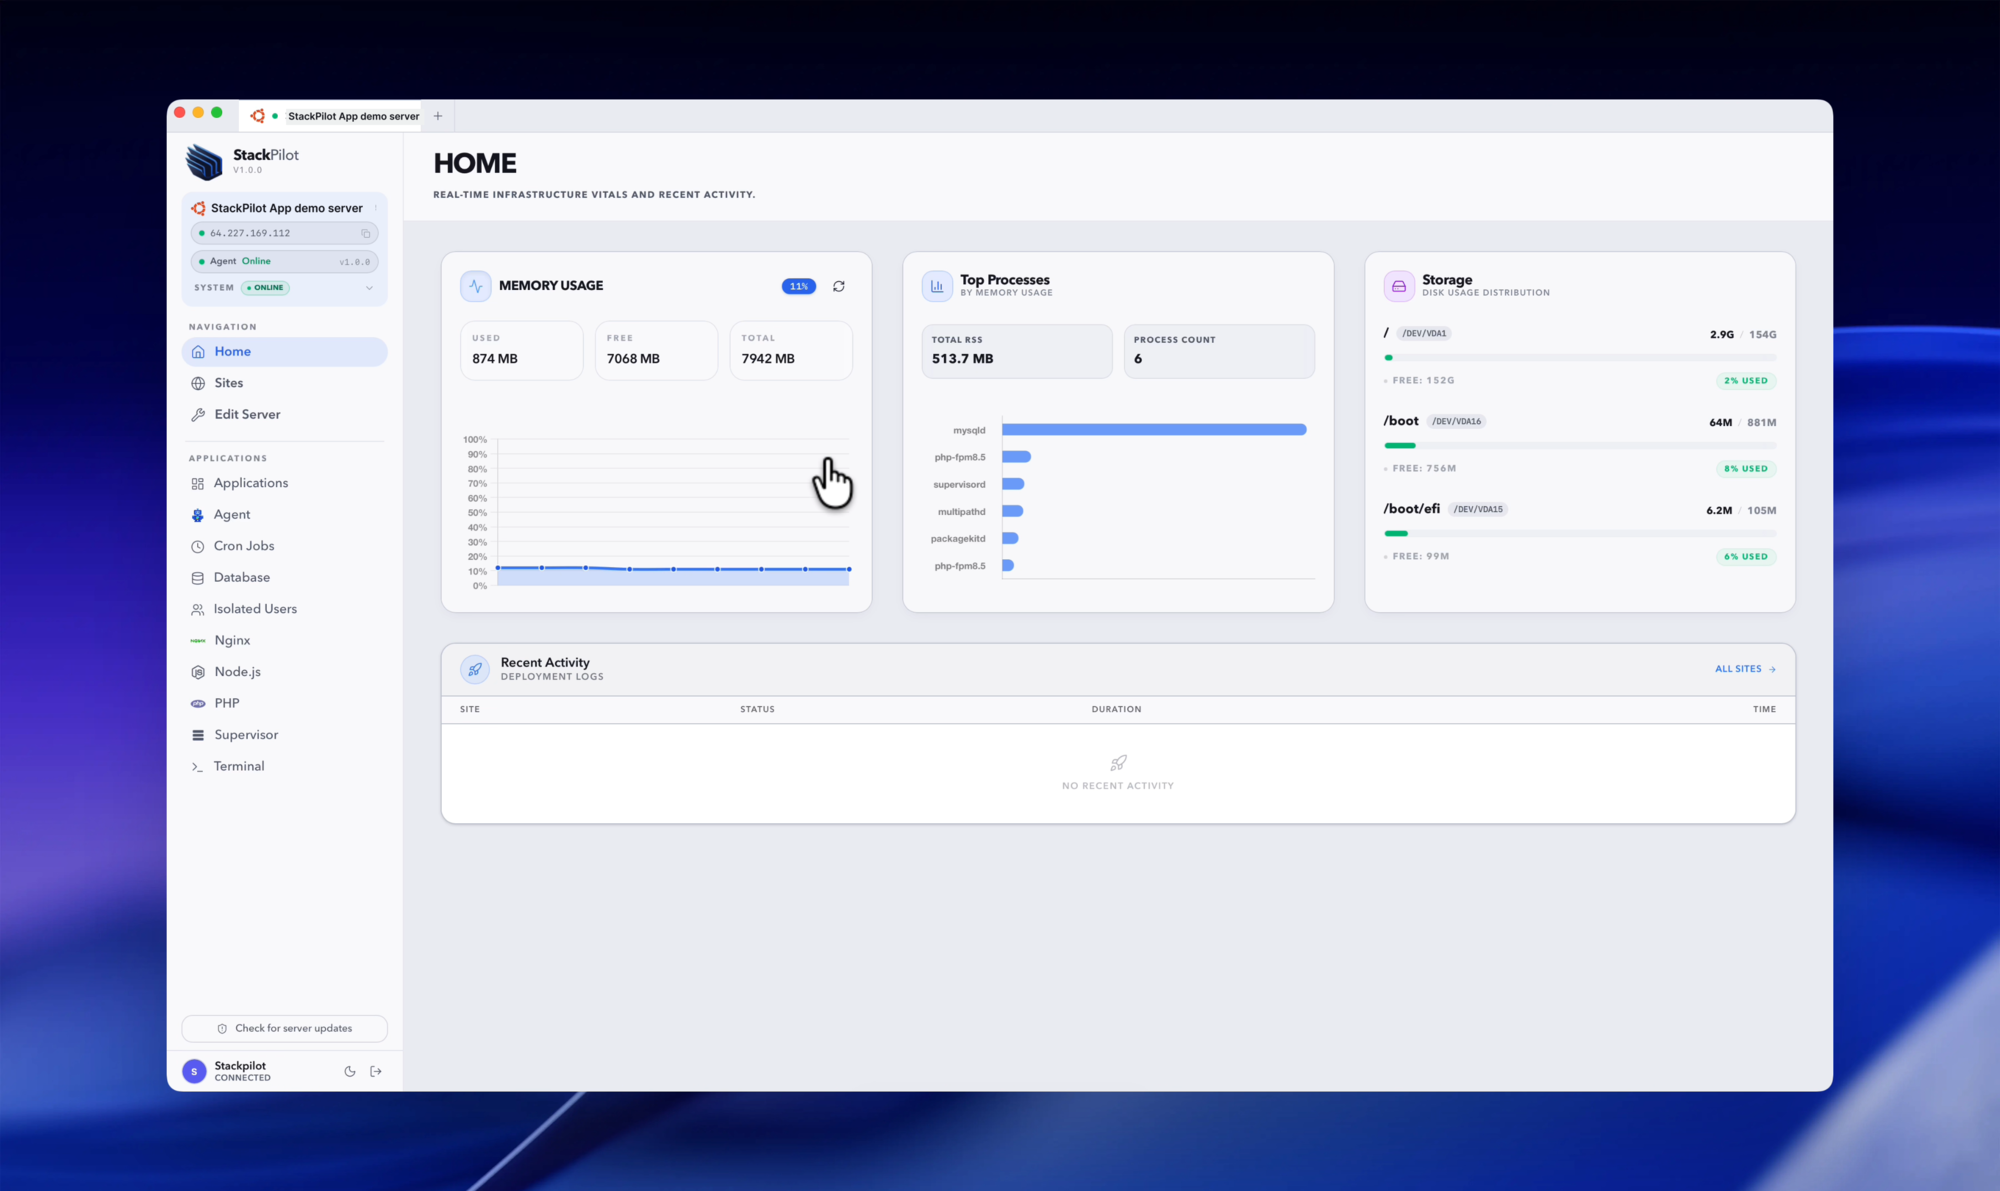
A few minutes later you have a dashboard instead of a to-do list: services running, versions visible, server ready for its first site.
Prefer not to rent the VPS yourself?
StackPilot App can also provision the VPS for you on AWS, DigitalOcean or Vultr with one click, then run the same setup on it. For every other provider (Hetzner, Linode, anything with an IP and SSH), bring your own server and connect it as above.
Why this works
It is worth understanding what StackPilot App actually does, because it is the same thing you would do by hand, done consistently:
- It is SSH, not magic. Every action is an SSH session from your machine, using your credentials. You can watch the log of each step as it runs.
- The steps are standardised. Firewall first, hardened defaults, pinned versions. Every server comes out the same way, so there are no snowflakes.
- State is visible. After setup, the dashboard reflects what is installed and running, so "what is on this box?" has an answer that isn't
sshand guesswork. - Credentials stay local. Keys, passphrases and generated database passwords live on your machine and your server. Nowhere else.
FAQ
Which providers does StackPilot App work with? Any provider whose VPS you can reach over SSH running Ubuntu or Debian. One-click provisioning (where StackPilot App creates the server for you) is live for AWS, DigitalOcean and Vultr.
Do I need to prepare the server first? No. A fresh Ubuntu install is exactly what StackPilot App expects. Point it at a brand-new VPS and it handles updates, firewall, runtimes and services.
Does StackPilot App install anything heavy on my server? It installs the stack you select, plus a lightweight agent used for monitoring and status. Everything is visible in the provisioning log.
Is my SSH key uploaded anywhere? No. StackPilot App is a desktop app. Your key is used locally to open the SSH connection, and secrets are stored in your OS keychain.
What operating systems does StackPilot App run on? macOS is generally available, and Windows is in public beta.
Summary
Setting up a production VPS by hand is a long checklist you rarely run and easily fumble. The commands are worth understanding once; they are not worth retyping every time. With StackPilot App you connect any Ubuntu or Debian VPS over SSH, pick your stack, and get a consistent, secured, fully visible setup in minutes, with your credentials never leaving your machine.
Ready to try it on your own server? Download StackPilot App or explore the features first.